Welcome to Club Scrap's Fire & Ice Blog Hop! If you are following along, you may have come here from Janet's blog. If not, or if you need to start at the beginning, check out Club Scrap Creates.
The November 2013 kit from Club Scrap is an interesting mixture of warm and cool colors and hot and cold designs, hence the name: Fire & Ice. Don't these colors just scream "burning hot!" and "freezing cold!"? Lovin' it!
When thinking about this blog hop, I was trying to come up with a Christmas card like I did last month with Lock & Key. You can see that card here. I could have used the red and gold, but there is a really cool "ice" stamp on the Borders & Backgrounds stamp sheet.
See it in the top right hand corner? Very unique! And although it's quite rare to have icy
Christmas weather here in Georgia, this stamp did make me think of
snowmen, and I love a "white Christmas" as much as the next girl.
Here are the supplies I used for my icy blue Christmas card (though I did change out the white StazOn ink for my much better Club Scrap white pigment ink pad).
- Black StazOn Ink
- Faded Jeans Ranger Distress Ink
- CS White Pigment Ink
- Two shades of Blue and the White Glossy Cardstock from Fire & Ice
- Icy Background Stamp (Fire & Ice)
- Snowman Stamp from CS 2005 Christmas Collection
- Post-It Note
- Small Snowflake Stamp from CS 2010 Happy Holidays
- Snowflake Brads
- 3/4 inch Blue Ribbon from CS 2009 Birds of a Feather
- Greeting Stamp from CS 2009 Joyful
First, I stamped the cute snowman on the Post-It note with black StazOn ink and trimmed out the lower part to create a mask (the sticky part is at the bottom of the snowman's body). Then I stamped the same cute little guy on the white cardstock. This StazOn cleaner is great for cleaning the stamp (I love clean stamps!).
I used the stamped Post-It note as a mask and covered the stamped image on the white cardstock. Then, I covered the lower part of the cardstock with the ice stamp inked with the distress ink. Peeled off the mask and voila! the snowman is standing on the ice!
To prepare the blue panel, I stamped it with small snowflakes using the CS white pigment ink (I stamped first onto scrap paper to make a lighter image). Adding three snowflake brads adds dimension to the background.
I "fussy cut" the snowman. No Copics in my studio since I'm not much of a color-er, so I pulled out my old Sakura micron pens to add a bit of color to my little guy. And to add more dimension, I added foam squares to the back of the white piece. On the front, I added a strip of ribbon and a fun sentiment to go with the fun snowman.
And here is my completed card. I love the effect that the masking does--the snowman looks like he's sitting on an icy hill, and he's as pleased as he can be!
If you've made it this far--thank you! I hope you like my fun Christmas card using papers and a stamp from the Fire & Ice collection.
Your next stop on the hop is Marya's blog, so click here. Happy hopping!
I have to admit that I don't often complete the projects we make at the Club Scrap retreat in a timely manner. I get the construction done during class, but when I get home life just gets in the way, and I don't get the item finished. This year, though, was different. Within a week I was done with the magnetic board project and it was on the wall outside my home office.
I actually wish I had taken a pic of my basic project before I started embellishing, but I did find one on the CS website!
This is pretty much the way mine looked when I finished Jac's class. But, I love the look of flattened bottle caps, so I didn't decorate mine (or put the magnets on the back) until I got home and pounded them with a mallet. Then I looked through my stash for flowers, leaves, and other dimensional embellishments to beautify my board.
I challenge YOU to take a constructed project and finish it!
I love it when someone takes the time to compile a large amount of information into one easy-to-navigate format, and someone at OWH has done just that. If you ever wanted to know pretty much all the terminology related to cardmaking, you can find it HERE!
Operation Write Home (OWH) serves American servicemen and women around the globe by providing handmade cards for them to write letters home to their loved ones and supporters. In fact, OWH recently "deployed" its 2.5 millionth card--that's 2,500,000 handmade cards that have gone to military personnel so that they can keep in touch with their families since 2007. I am very pleased to be a tiny part of this amazing project.
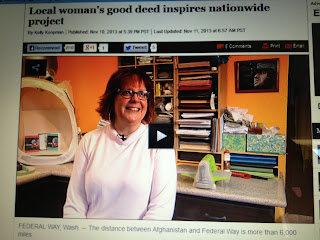
To see a recent local news segment about OWH founder Sandy Allnock and her mission, click HERE, and then click on the photograph. When you see Sandy open her door to pick up a box of donated cards, look closely at the return label. I'm pretty sure that's a Club Scrap label--and those cards are from CS members!!
OWH has guidelines to follow for submitted cards on their site. Another way to help is by donating money to help SEND those boxes overseas. It costs quite a bit to mail those packages! All donations are tax-deductible.
I do wish OWH was around when my hubby was overseas!


